Test an Air Gap Installation with Compatibility Matrix
This tutorial demonstrates how to test an air gap installation of a Helm chart using Replicated Embedded Cluster and Replicated Compatiblity Matrix (CMX).
Introduction
Software vendors can use Replicated's Compatibility Matrix (CMX) to quickly provision clusters and VMs that simulate air-gapped environments. CMX also has network reporting features that allow vendors to generate reports on network activity for their application, such as recording requests to domains that are not on an allowlist. These features help vendors that distribute applications into customer environments with little or no outbound internet access to more easily test their releases. For more information about using CMX to test releases in air-gapped environments, see Test in Air Gap Environments.
In this tutorial, you will do the following to learn more about the CMX network policy and reporting features:
- Download the Helm chart and release manifests for a sample NGINX application
- Create a release in the Replicated Platform
- Build an
.airgapbundle for the release - Create a VM with CMX, and set the VM's network policy to
airgapto simulate an air-gapped environment - Follow the Embedded Cluster air gap installation instructions to download the air gap bundle, transfer the bundle to the air-gapped VM, and then install with Embedded Cluster
- Make an outbound request from the NGINX app, and view the attempt in the CMX network report
Set Up Your Environment
Before you begin, do the following to set up your environment:
-
Install the Helm CLI, which is the tool for interacting with Helm and managing Helm charts. See Install Helm.
-
Ensure that you have CMX credits. You can request credits by going to Compatibility Matrix > Request more credits in the Vendor Portal. For more information about CMX credits, see Billing and Credits.
noteIf you are new to the Replicated platform, you might be eligible for $100 in free CMX credits. To request your free credits, reach out to our sales team at https://www.replicated.com/contact and note in the comments that you are completing a Replicated tutorial.
-
Ensure that you have an SSH key in your GitHub account. Then, add your GitHub username to your Vendor Portal Account Settings. This will provide SSH access to VMs that you create with CMX. For more information, see Set Up SSH Access in Create VMs.
Tutorial
Create an Application
-
On your local machine, install the Replicated CLI:
-
MacOS
brew install replicatedhq/replicated/cli -
Linux / Windows Subsystem for Linux (WSL)
version=$(curl -s https://api.github.com/repos/replicatedhq/replicated/releases/latest \
   | grep -m1 -Po '"tag_name":\s*"v\K[^"]+')
curl -Ls \
   "https://github.com/replicatedhq/replicated/releases/download/v${version}/replicated_${version}_linux_amd64.tar.gz" \
   -o replicated.tar.gz
tar xf replicated.tar.gz replicated && rm replicated.tar.gz
mv replicated /usr/local/bin/replicated
For more information and additional installation options, see Install the Replicated CLI.
-
-
Authorize the Replicated CLI:
replicated loginIn the browser window that opens, follow the prompt to log in to your Vendor Portal account and authorize the CLI.
-
Create an application named NGINX:
replicated app create "NGINX" -
Set the
REPLICATED_APPenvironment variable to the application that you created:export REPLICATED_APP=APP_SLUGWhere
APP_SLUGis the unique application slug provided in the output of theapp createcommand.Setting the
REPLICATED_APPenvironment variable allows you to interact with the application using the Replicated CLI without needing to use the--appflag with every command.
Create a Release
-
Run the following command to download a tarball containing the release files:
curl -O --create-dirs --output-dir tutorial-airgap https://docs.replicated.com/nginx-0.1.0-release.tar.gz -
Untar:
cd tutorial-airgaptar -xzf nginx-0.1.0-release.tar.gz && rm nginx-0.1.0-release.tar.gz -
View the contents of the
manifestsdirectory:ls manifestsec-config.yaml nginx-0.1.0.tgz nginx.yaml replicated-app.yamlThe contents include the NGINX Helm chart archive (
nginx-0.1.0.tgz) and some Replicated manifests that are used to define different aspects of the installation experience for the application. -
Lint the YAML files in the
manifestsdirectory:replicated release lint --yaml-dir manifestsnoteYou can ignore
infoorwarnmessages for the purpose of this tutorial. -
Create a release and promote it to the Unstable channel:
replicated release create --yaml-dir manifests --promote UnstableExample output:
• Reading manifests from . ✓
• Creating Release ✓
   • SEQUENCE: 1
• Promoting ✓
   • Channel 2kvjwEj4uBaCMoTigW5xty1iiw6 successfully set to release 1
Build the Air Gap Bundle
-
Log in to the Vendor Portal.
-
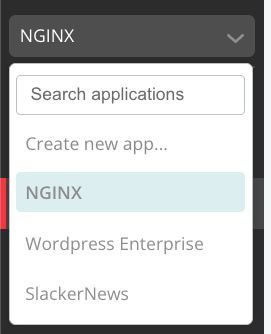
In the application drop down, select the NGINX application that you created.
-
Go to Channels.
-
On the Unstable channel card, in the Latest release section, click Release history.
-
On the Release History page, find the release sequence that you just promoted.
-
(Optional) Click View release image list to see the images that Replicated will include in the air gap bundle. This release includes an NGINX image and the Replicated SDK image.
-
Next to "Air gap not built", click Build.
Wait a few minutes for the air gap bundle to build.
noteYou might need to refresh the page to check the build status.

Create a Customer
-
Click Customers > Create customer.
The Create a new customer page opens.
-
For Customer name, enter a name for the customer. For example,
Nitflex. -
For Assigned Channel, select Unstable. This allows the customer to install releases promoted to the Unstable channel.
-
For Customer type, select Development.
-
For Install types, enable Embedded Cluster (current generation product).
-
For Additional install options, enable Air Gap Installation Option (Replicated Installers only).
-
Click Save Changes.
Download the Installation Assets
-
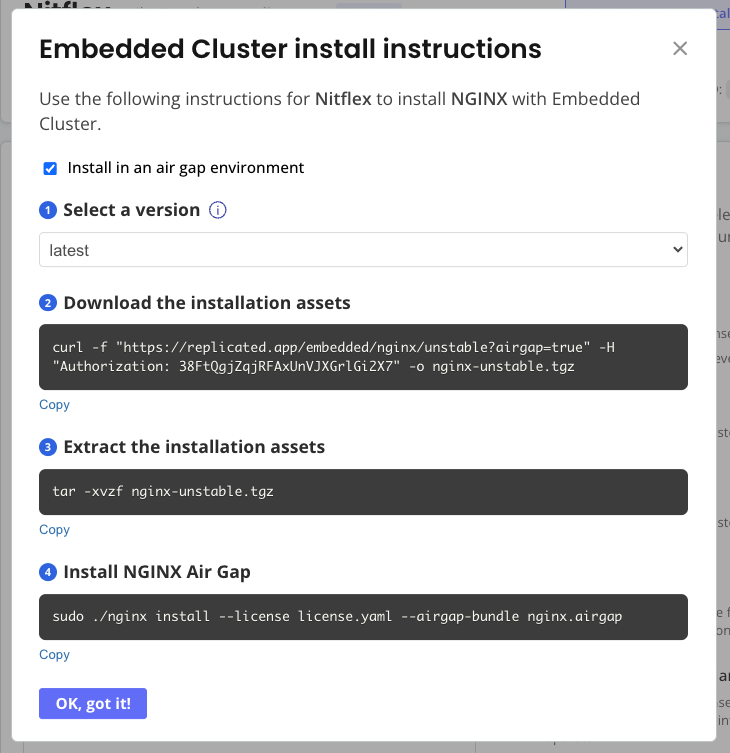
On the page for the customer you just created, click Embedded Cluster install instructions.
-
In the Embedded Cluster install instructions dialog, verify that the Install in an air gap environment checkbox is enabled. This checkbox is automatically enabled when the customer license has the air gap install option and an air gap bundle exists for the latest release on the channel.
-
On your command prompt, run the first command in the dialog to download the Embedded Cluster air gap installation assets.
It can take a few minutes to download the installation assets.

Create a VM with CMX
-
In the Vendor Portal, go to Compatibility Matrix.
-
Click Create > Create VM.
-
On the Create a Virtual Machine page, complete the following fields:
- OS distribution: Ubuntu
- Version: 24.04
- (Optional) TTL: Optionally increase the TTL for the VM if you want more time to test the installation.
Leave the default values for the remaining fields.
-
Click Create VM.
-
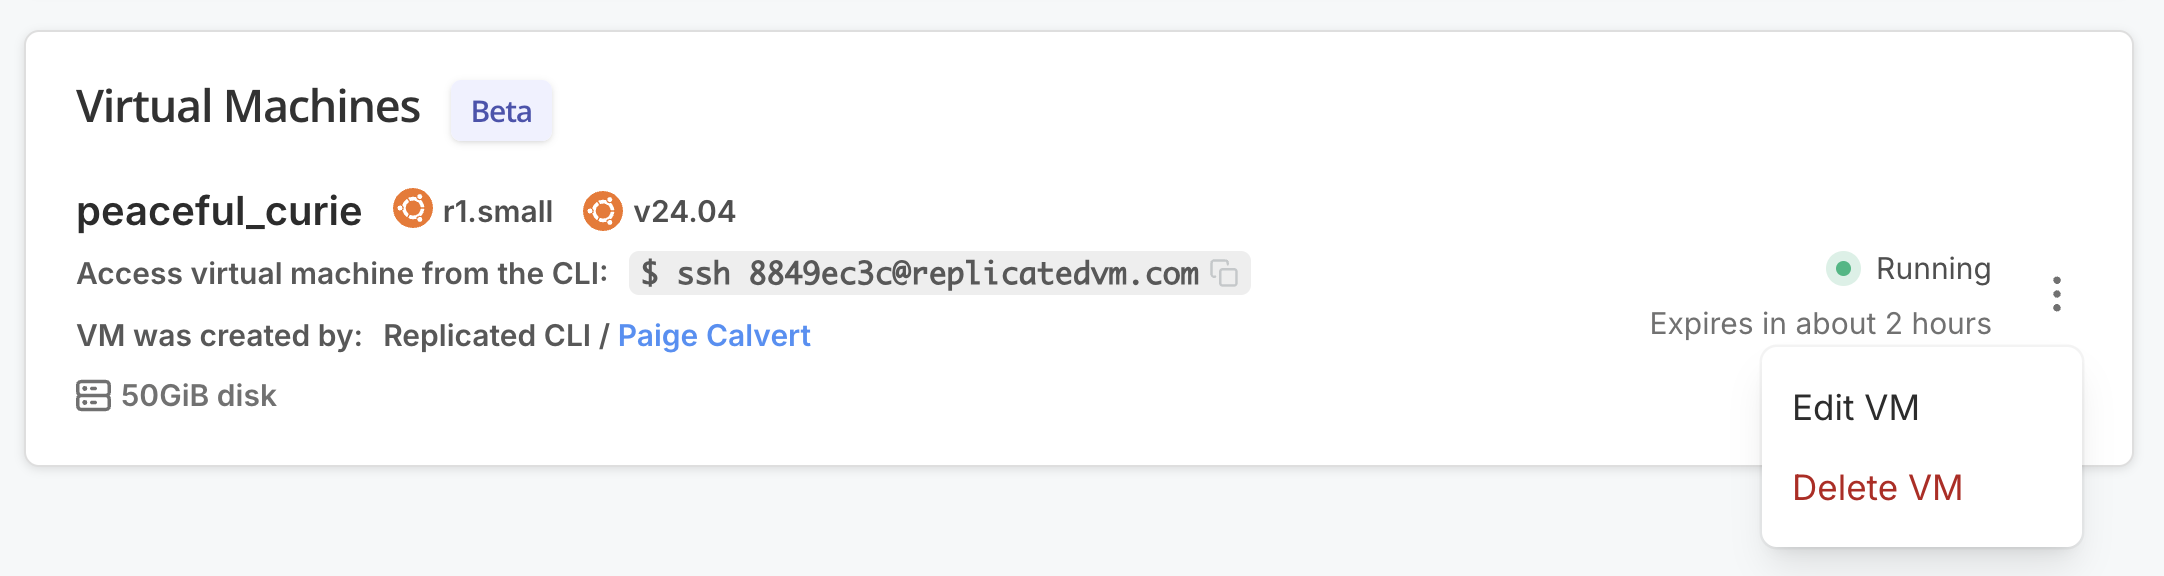
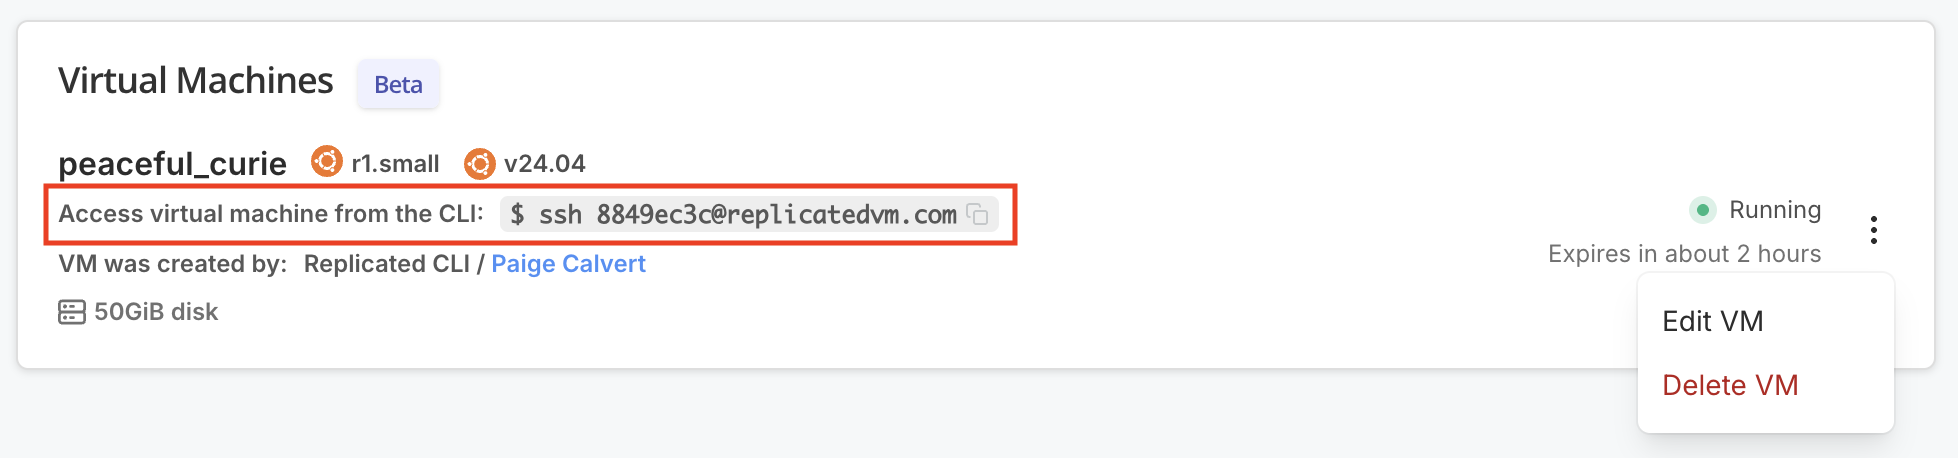
Open the dot menu for the target VM and click Edit VM.
-
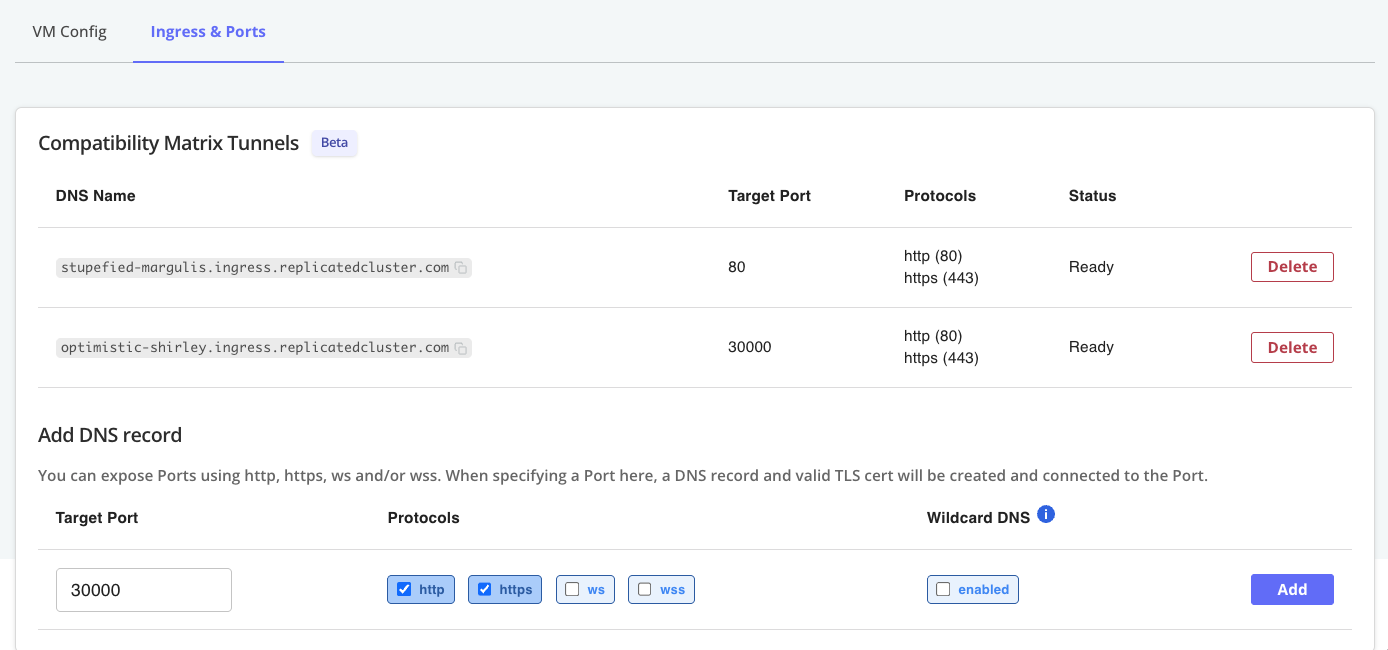
Under Ingress & Ports, for Add DNS record, click Add to create a DNS record with the default Target Port of 30000.
-
Add another DNS record with a Target Port of 80.
The following shows an example of both of these DNS records added to a VM:
-
Copy both of the URLs under DNS Name for the records that you created, and save them somewhere on your local machine. You will access the Admin Console and the NGINX app at these URLs after you install.
-
In the panel on the left side of the screen, click Network Policy.
-
On the Network Policy page, for the network where your VM is connected, set Policy Type to
airgap. This prevents outbound internet requests from the VM, allowing you to simulate an air-gapped installation environment. -
Then, toggle Reporting for the network to on. This allows you to view a network report for the air-gapped VM, which includes details about all connection attempts and DNS queries.
SSH Onto the VM and Transfer the Installation Assets
-
In the panel on the left side of the screen, click Overview to return to the Compatibility Matrix Overview page.
-
Under Virtual Machines, after your VM is "Running", copy the SSH command provided.
-
On your command prompt, run the SSH command.
-
If you are prompted to add the fingerprint for replicatedvm.com, type
yesand press Enter. -
When prompted, provide the passphrase for the SSH key in your linked GitHub account.
-
Open a new command prompt window.
-
In the new window, get the SCP endpoint for the VM:
replicated vm scp-endpoint VM_IDWhere
VM_IDis the ID for your VM. You can get the ID by runningreplicated vm ls.Example output:
scp://yourusername@37.27.52.178:43663 -
Transfer the
.tgzinstallation assets that you downloaded as part of Download the Installation Assets to your VM using the SCP endpoint:scp PATH_TO_TGZ scp://GITHUB_USERNAME@SSH_ENDPOINT:PORTWhere:
PATH_TO_TGZis the local path to the.tgzinstallation assets that you downloaded.GITHUB_USERNAME,SSH_ENDPOINT, andPORTare all copied from the SCP endpoint that you retrieved.
Example:
scp nginx-unstable.tgz scp://yourusername@37.27.52.178:43663 -
When prompted, type
yesto connect to the host. -
When prompted, type your passphrase for your SSH key and press Enter.
Wait for the
.tgzto transfer to your VM. This can take a few minutes.
Extract the Installation Assets and Install NGINX
-
In the Vendor Portal, go back to the customer's page and reopen the Embedded cluster install instructions dialog.
-
Copy the command for the Extract the installation assets step and run it on your VM to extract the
.tgzthat you transferred. -
Copy and run the
installcommand. -
When prompted, set a password for accessing the Admin Console. Remember the password that you set; you will use it to log in to the Admin Console in a later step.
The installation takes a few minutes to complete.
-
After the installation completes, open a shell so that you can interact with the cluster with kubectl:
sudo ./APP_SLUG shellWhere
APP_SLUGis the slug for your application. -
Use kubectl to verify that the NGINX pod is
running:kubectl get pods --namespace kotsadmkotsadm-7c6457b99c-gjfz6 1/1 Running 0 37s
kotsadm-rqlite-0 1/1 Running 0 2m1s
kurl-proxy-kotsadm-b9fdfdb7f-sxk7w 1/1 Running 1 2m1s
nginx-6d58d68945-nbbzx 1/1 Running 0 29s
replicated-6798d88b48-b6575 1/1 Running 0 29sIn the kostadm namespace, you can see
kotsadmpods for the Admin Console, thekurl-proxy-kotadmpod for the image registry that is deployed in air gap installations, thenginxpod for the NGINX application, and thereplicatedpod for the Replicated SDK. -
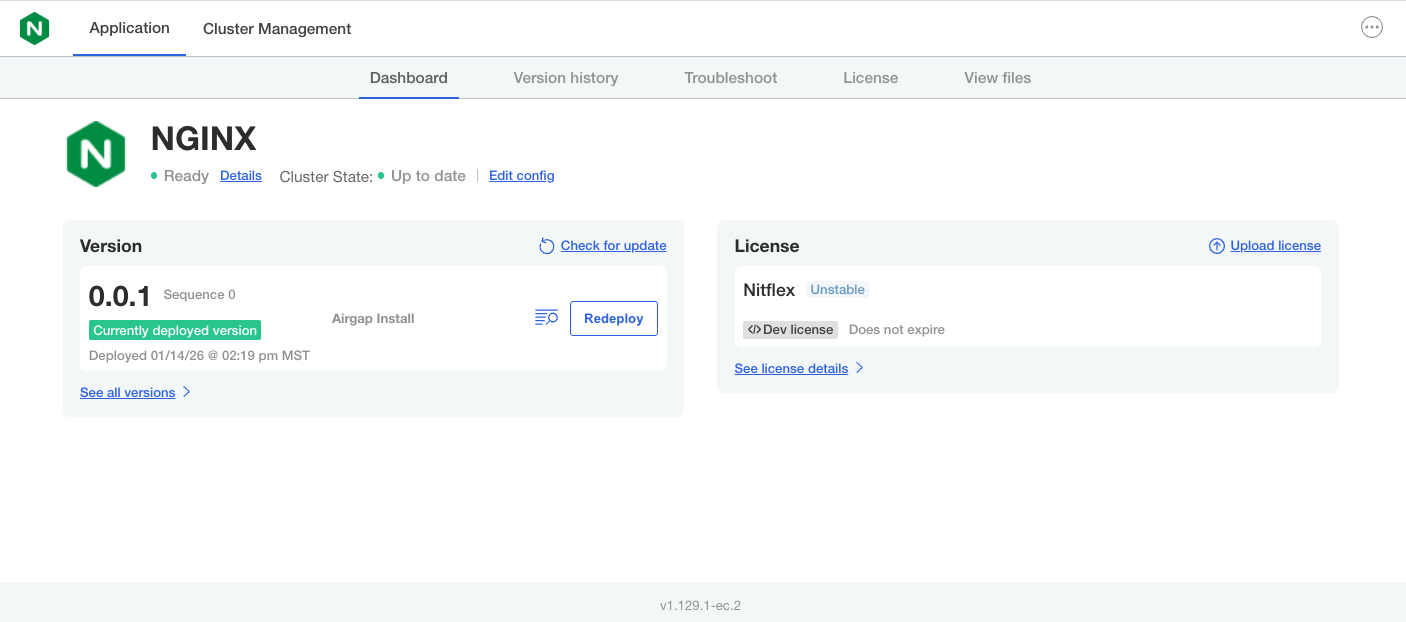
(Optional) In a browser, go to the Admin Console. The Admin Console is available at the URL for the DNS record that you created with a target port of 30000 as part of Create a VM with CMX.
noteYou can find the URL by going to Compatibility Matrix > Edit VM > Ingress & Ports in the Vendor Portal.
Log in to the Admin Console using the password that you set during installation.
On the Admin Console landing page, you can see the app version that you deployed, and that the NGINX app is Ready:
Access the NGINX App and View the Network Report
-
Get the ID for the air gap network where your VM is connected:
replicated network ls -
Run the following command to watch the network report:
replicated network report NETWORK_ID --watchWhere
NETWORK_IDis the ID of the network. -
In a browser, go to the URL for the NGINX app. This is the URL for the DNS record with a target port of 80 that you created as part of Create a VM with CMX.
noteYou can find the URL by going to Compatibility Matrix > Edit VM > Ingress & Ports in the Vendor Portal.
-
On the NGINX app webpage, click Test Outbound Request to make an outbound network request to
http://httpbin.org. As shown below, the webpage displays an Egress blocked message because theairgapnetwork policy for the VM does not allow outbound requests.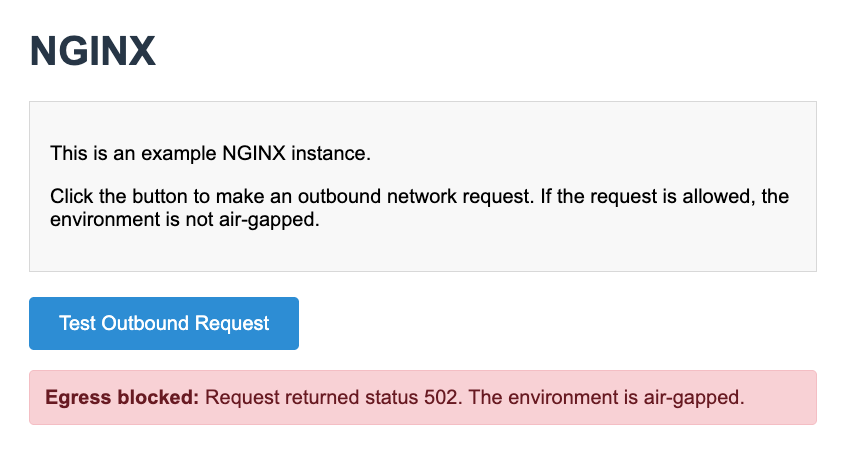
-
On the command prompt where you are watching network activity for the VM, note that you can see a network event similar to the following, which records the request to
httpbin.org:{"timestamp":"2026-01-14T21:31:32.023130266Z","srcIp":"10.244.26.14","dstIp":"1.1.1.1","srcPort":59247,"dstPort":53,"proto":"UDP","comm":"nginx","pid":8641,"likelyService":"dns","dnsQueryName":"httpbin.org"} -
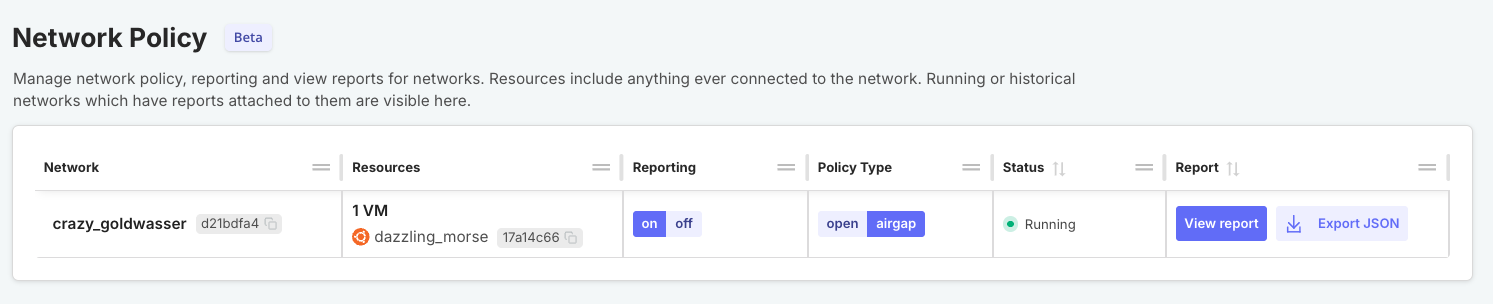
In the Vendor Portal, go to Compatibility Matrix > Network Policy and click View report for the network where your VM is connected.
-
Under Domain Names Requested, note that the
httpbin.orgdomain is listed in the table along with the number of requests made.
Clean Up
-
Delete the VM:
replicated vm rm VM_IDWhere
VM_IDis the ID of the VM. You can runreplicated vm lsto get the ID.
Summary
Congratulations! As part of this tutorial, you:
- Performed an air gap installation with Embedded Cluster in a VM
- Used the Compatibility Matrix network policy feature to simulate an air-gapped environment
- Used the Compatibility Matrix network reporting feature to track outbound network requests made by an application
For more information about testing with Compatibility Matrix in air-gapped environments, see Test in Air Gap Environments.
For more information about installing in air-gapped environments with Embedded Cluster, see Air Gap Installation with Embedded Cluster.